Showing posts with label giclee. Show all posts

April 6, 2014

Disappearing Panda Fundraiser for WWF

Like most of the world, I've been in love with pandas since I was small enough to be aware of them. My first magazine subscription was National Geographic, which I paid for with my own money and gained most of my knowledge of the outside world. I've only had one quick glance of a panda at the National Zoo in DC. The small window and huge crowds where disappointing and nothing like I long imagined my experience would be like. Since then, pandas live on only in nature documentaries and books for me, and I am content with the fact that I will probably never see one in my lifetime.


I made the painting "Disappearing Panda" many years ago after coming across an old book "The Last Panda" by George B. Schaller.


I had barely remembered owning the book and found a newspaper clip inside about Hsing-Hsing, a panda at the National Zoo. I found this clip just a couple months after visiting the National Zoo.

Chicago Sun-Times, April 17, 1997
Hsing-Hsing had been a wild panda before being gifted by China to the National Zoo. He died in 1999 at the age of 28, which at the time was the longest for a panda living in captivity.

World Wildlife Fund Panda Facts
The National Zoo Panda Facts

I've created a print on panel of "Disappearing Panda". Half of all print sales of will be donated to the World Wildlife Fund. It can be purchased on Etsy and will be shipped with proof of the $20 donation.

Disappearing Panda - 5x5 print on panel $40
The World Wildlife Fund has been protecting nature for over 50 years. To learn more about them go here

November 18, 2013

Giclée Prints Part 3: Paper

There are seemingly endless varieties of giclée substrates to print on: watercolor and photo paper, canvas, adhesive paper, fabric, signage material such as vinyl and backlight media. There are many important factors to consider when choosing a substrate.

Not all substrates are equal. Many brands sell similar substrates in various levels of quality and use terms such as "museum quality" or "artist grade". Every type of substrate should provide a specifications sheet. This sheet should list a brief description of the substrate, its applications and proper conditions of use and storage. You should also find a list of the technical specifications. This list may or may not include: weight, thickness, surface finish, whiteness, opacity, OBA content, pH-Value, acid free, water resistance, rag content and/or calcium carbonate buffered.

Paper Weight and Thickness
Paper weight is often confused with paper thickness. In reality, paper weight is density or volume and is measured in grams per square meter (gsm). Paper thickness is measured in thousandths of an inch. 

When choosing a paper consider the weight/thickness for handling purposes. A lighter paper will crimp more easily. On the other hand, check your printer's specifications for the maximum paper weight in order to avoid paper jams and printhead issues.

Paper Finish
Surface finish is a matter of preference and is different with every substrate. Many paper companies sell letter-size sample sheets. This is a good investment.

Optical Brighteners
Optical brightener agents (OBA) make paper look bright white and they can be great for punching bright colors, but OBAs can cause premature yellowing. Substrates can have varying amounts of OBAs. If possible, avoid OBAs.

Acid Content
If you want your print to last, choose a paper that is 100% rag. Paper that is 100% rag is made of cotton, opposed to wood pulp, which may have a high concentration of acid.

The substrate you print on should also be acid-free. Your specifications sheet might tell the pH-value, which if neutral, should be between 7 and 9.5. Calcium carbonate is sometimes added during the paper making process to make the paper pH-neutral. It has the added effect of neutralizing other acids in the environment that may cause the paper to become acidic over time.

Printer and Paper Compatibility
You may have found the perfect substrate, but don’t bother using it if it isn't compatible with your printer. It is important to do your research before ever testing the first sheet. Not only is compatibility important for optimal longevity and print quality, but for the life of your printer. If you put a substrate in your machine it isn’t meant to have, you could ruin your printheads and/or spray ink all over the inside of your printer.

Up next, Part 4 Digital Files & Photography.

Bittersweet No. 1 (detail) 
Lenten Rose No. 1 (detail) 
Moments (detail)

March 5, 2011

Giclée Prints Part 2: Printer and Ink


Giclée is a high-quality archival inkjet print. Printers vary in dot size, and inks vary in longevity. Be careful because even the best printer can be run at a more economical setting resulting in a soft and dull print. The key is to ask a lot of questions if you're buying prints, and provide a lot of information if you're selling prints. 
 
Ink Type
Inkjet printers use either dye or pigment ink. When giclée printers were first used to make fine art prints, they used dye-based inks that were able to print a small dot size and wide color gamut on uncoated paper. Dyes are absorbed into the paper and are considered archival because in the right conditions they can last 50 years or more. Five years ago some debated that dye based inks were the best. Today the color range in pigments has now surpassed dyes and the added longevity now makes them a far better choice than dyes. Pigments require a coated paper stock that is compatible with the printer. The right combination of paper, printer and inks will produce a print that will last up to 200 years if stored and displayed properly.

In an attempt to save money, some printmakers have switched out the manufacturer’s inks for a third-party’s low-cost cartridge-refilling system, usually sold in bulk amounts. Ink in bulk can get old and clog print heads, affecting printer performance. Some photographers switch out colored inks for black and gray tones, when looking for a true black and white photograph.

Print Permanence Ratings
Wilhelm Imaging Research evaluates print permanence ratings (or longevity) for nearly every printer. Before buying a printer or investing in a print run, check out the testing done by Wilhelm. Luminous Landscape is also known for comprehensive reviews of printers. More print permanence information is available on the  DP & I website.

Dot Size
You've probably heard of DPI (dot per inch), which refers to density, or the amount of dots per inch. DPI can change based on the printer settings. The printer also has an actual dot size that is measured in picoliters (1 picolitre (pl) = 0.000000000001 liter) that cannot be changed. Some printers use variable size ink droplets, meaning that various inks will print with different drop sizes. Smaller dot sizes result in finer detail, smoother gradients and less graininess. Five years ago a 6 pl dot was considered small. Today’s printers have dots as small as 1.5 pl. Some will argue that anything smaller than 3 pl cannot make a difference in print quality.

Printer Settings and Color Profiles
Dot size will mean nothing if the printer is not used to its highest capability. There are various print modes, such as "normal" and "best", in the print dialog box that control the density of ink. Bi-directional printing, another option in the printer dialog, means the printer will lay down ink in both directions. Bi-directional can save time, but in some cases can decrease quality and put extra stress on the printer.

The right color profile in the printer settings is one of the most important things to get right. Printers like the HP Designjet Z3200 allow the user to make and install their own custom profiles. If you don’t have a printer like this you will have to use a spectrometer and other expensive color measurement equipment to make a profile unique to your printer, paper and environment. If this is beyond your means, most paper suppliers provide profiles they have made. Color profiles are complicated and can be hard to understand. Just remember that everything has its own profile and in order to get a good print you need to ensure they all work together - your monitor, Photoshop, the image, the paper and the printer.

You can have the smallest dot size and greatest longevity, but printer and ink are only part of what it takes to make a great print. In Part 3, I will discuss paper and other substrates. 

Giclée Prints Part 1: A Great Giclée

Giclée Prints Part 3: Paper and Other Substrates


February 26, 2011

Repairing Family Photographs

Repairing Family Photographs

Light, mold, moisture and non-archival materials can damage family photographs. Light as well as the frame has damaged the photo below. It would take a restoration professional to bring this one back to its original state. Luckily, we have found an 8x10 copy that is in better condition.
Photograph exposed to light and acidity
Although the 8x10 copy was stored in a typical family photo album, it also has signs of deterioration, mostly in terms of a shift in color. Most typical photo albums are not made of acid-free materials and are not intended for long-term storage.
Photograph stored in album before digital restoration
I have decided the only way to truly preserve the family photos is to digitize them. Most need some amount of color correction. The biggest problem is scratches and dust from the original film.

The following instructions will show you how to eliminate scratches and dust as well as some tips on correcting color issues. Good luck.

1.    Color profiles can be complicated but are very important to getting the color correct. Almost all household scanners and point-and-shoot digital cameras will embed the RGB color profile sRGB IEC61966-2.1. If you are only viewing images on the web, this profile is fine, but for print you will want to convert to Adobe RGB1998. Make sure you first assign the sRGB profile to your image if it doesn’t have an embedded profile then convert to RGB1998.
Under Color Setting check all boxes "ask when opening"
2.    Reduce Noise (Filter-Noise). Removes color artifacts made up by scanners and digital cameras, especially in low light situations. I recommend a strength of 6-8. Keep the rest of the levers between 40-60%.
3.    Fix the color using the tools you feel comfortable with. This photo, like many old photos is too red. I will use Selective Color to take red out of red. I will also use Curves to adjust the reds in the Red Channel, as well as adjust the yellow in the Blue Channel. Use your Info Palette to read the color numbers.
4.    Many original old photographs have lots of dust, speckles and scratches. The Dust & Scratches Filter (under Noise) is helpful but to make it more effective first sharpen your file using Sharp Sharpen or Unsharp Mask. The amount will vary based on your image. I recommend turning off the sharpen feature on your scanner and using only Smart Sharpen in Photoshop. In this photograph I used Amount 80%, Radius 1.6, More Accurate, Shadow and Highlight Fade Amount 30%, Tonal Width 50%, Radius 3 pixels.
Before sharpening and dust & scratches
5.    The sharpening enhanced the dust and speckles so that the Dust & Scratches Filter (under Filter/Noise) could find them. In this photograph I use Radius 3 pixels and Threshold 30 levels. Higher radius and lower threshold enhance the effect. I usually stay between 1-3 radius and 20-40 threshold when using this tool.
Detail, after color correction, sharpening dust & scratches
6.    Always save your files to be printed as tiffs. You should think of jpegs as temporary files to transfer images to the web or email.
Final corrected photograph

September 1, 2010

Giclée Prints Part 1: A Great Giclee

Most buyers and artists have an idea of what a giclee print is but most don't realize there are significant differences between an acceptable giclee and a great giclee. This post will be the first in a series of posts on the details of making, selling, and buying giclee prints.

There are four basic things to consider when making or buying a giclee print. I will go into more detail in future posts.

Printer/Ink: Giclée is a high-quality archival inkjet print. Printers vary in dot size and inks vary in longevity. Be careful, because even the best printer can be run at a more economical setting, resulting in a soft and dull print. The key is to ask a lot of questions if you're buying prints, and provide a lot of information if you're selling prints. In a later post, I will list questions to ask your printer.

Paper: The best option is 100% rag paper without optical brightener agents (OBA). Optical brighteners make paper look bright white but can react with atmospheric pollutants and yellow over time. The paper must also be compatible with the printer and ink for optimal longevity.

Image: This is the part hardest to get right. Great photography of artwork for reproduction can really only be done by a professional. Getting a high-resolution, color-correct digital file will ensure your print has depth, saturation, detail and sharpness. Many professional photographers who specialize in fine art reproduction are using digital scanning backs that create files many hundreds of megabits or even gigabits. 

Matting and/or Framing: Giclee prints, like other works on paper, should be protected from UV light, moisture and atmospheric pollutants. Always use 100% acid-free materials. Avoid adhesives and use polyethylene bags to protect your print before it is framed.

In the end, you can have the best printer and paper, but what's the point if your digital file is just okay. And why put that great print in a frame that is going to ruin it in a couple years. In my next couple posts I will go into further detail in each of these categories and explain some of my experiences over the past ten years of making giclee prints.

Giclée Prints Part 2: Printer and Ink

Giclée Prints Part 3: Paper

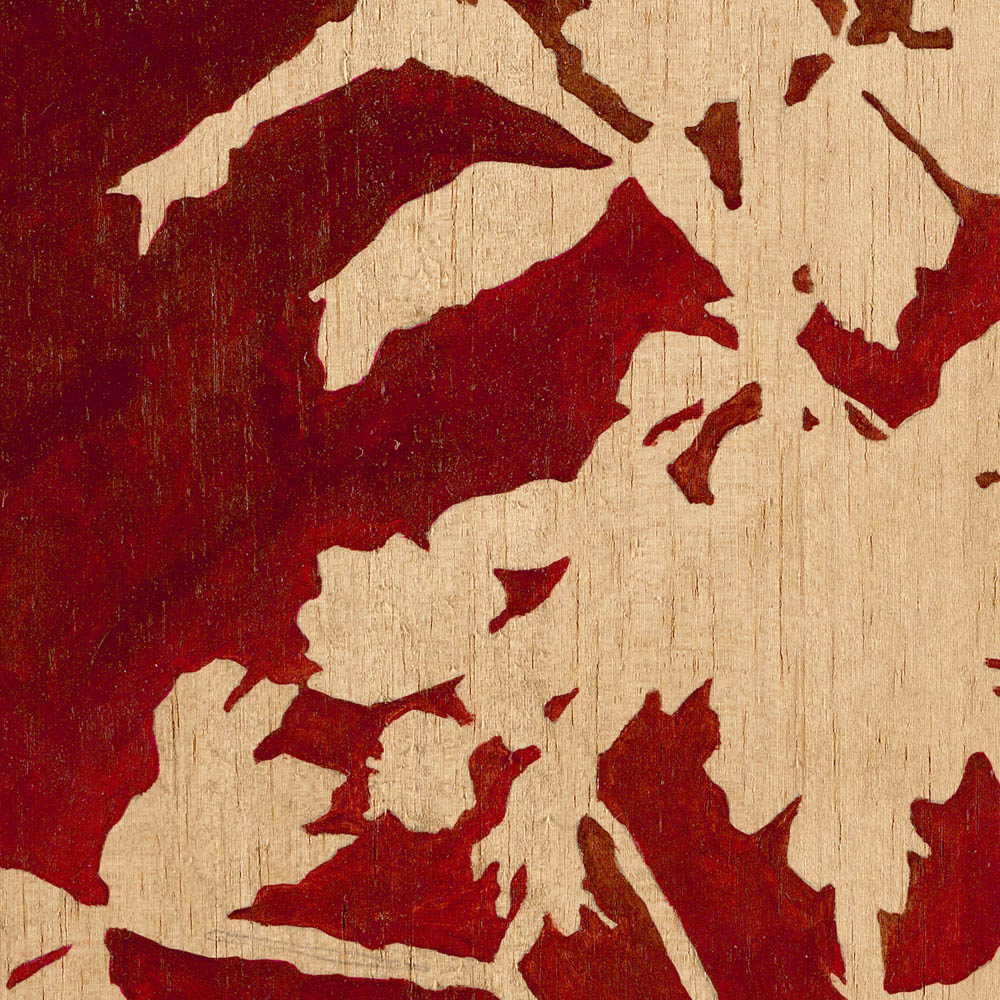
Below are details of some of my paintings taken with a BetterLight scanning back.